Prepare the fields
Give the form an email field, plus any name or custom fields you want in Loops.
Loops integration
The Forminator Loops integration uses ClickSyncr for Loops to send each submission to a Loops mailing list.
A clear setup path
Keep the existing form and configure the destination beside the workflow you already use.
Give the form an email field, plus any name or custom fields you want in Loops.
Paste your Loops API key into the connection settings and connect.
Pick where new subscribers land in Loops: the list, group, form or audience you use.
Pair each form field with a Loops field. Email is required; the rest is optional.
Send a test entry, then find the new subscriber in Loops before you rely on the form.
The Forminator Loops integration uses ClickSyncr for Loops to send each submission to a Loops mailing list. Its application integration lets you connect the account, choose the destination, and map the answers collected by this form.
You need an active Forminator installation, a Loops account, and access to its API key. The plugin’s readme, checked on 10 November 2026, requires WordPress 6.7 or later and PHP 7.4 or later. Prepare an email field and the other answers you want to collect before opening the integration.
If the Forminator form should collect a marketing choice, add a suitable consent input before mapping. Decide which Loops mailing list should receive the contact. This gives you a specific destination to check when testing, instead of looking only for a successful form confirmation.
In WordPress, open Plugins > Add New. Find ClickSyncr for Loops – Contact Form 7, WPForms, Gravity Forms, Ninja Forms, Fluent Forms, Formidable & Forminator, then select Install Now and Activate. Keep Forminator active too: ClickSyncr adds an integration to that builder’s form settings.
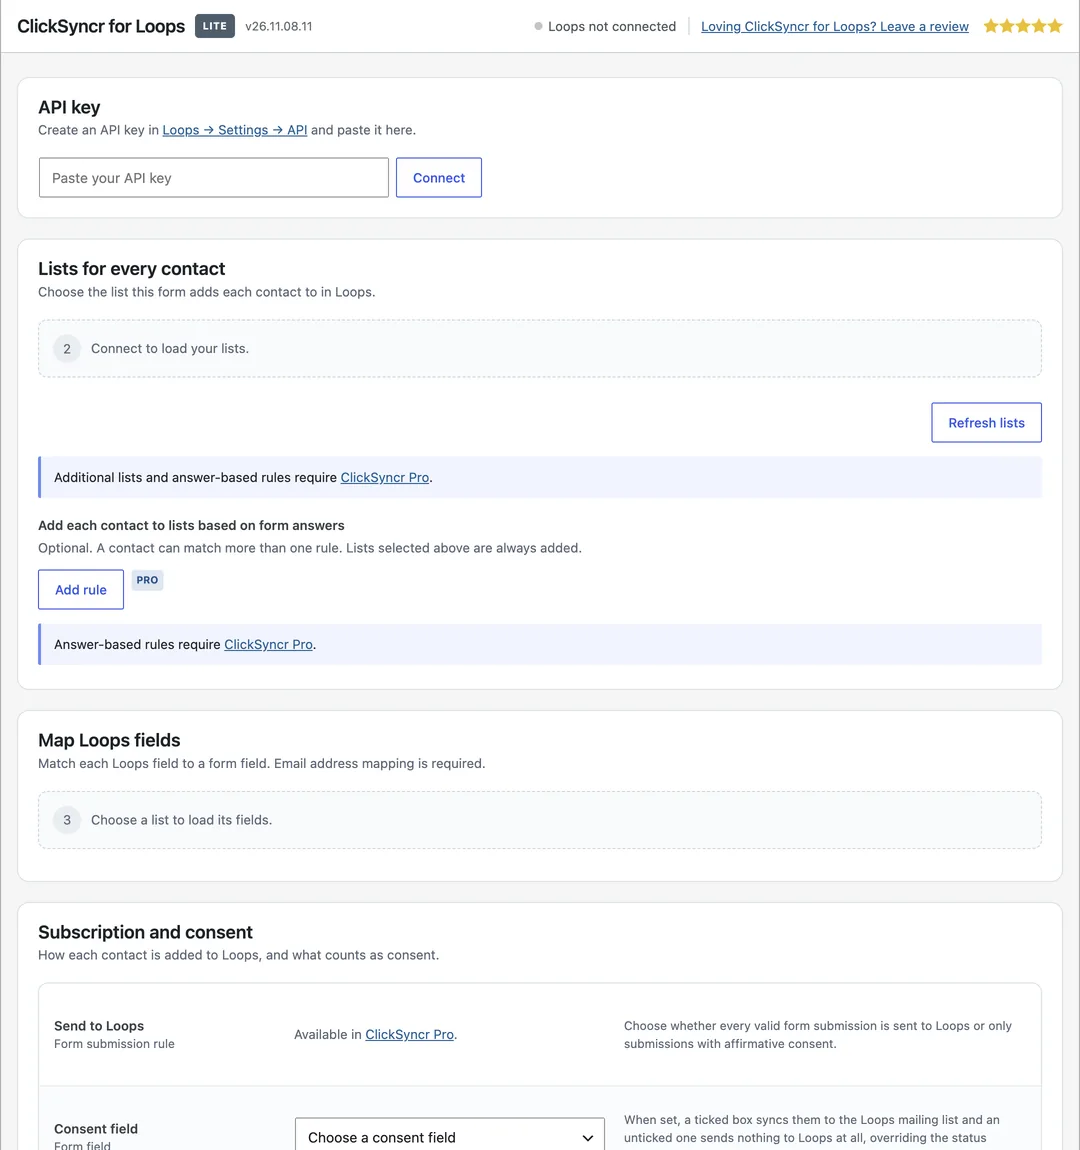
Activate ClickSyncr for Loops in Forminator’s integrations area. Edit the form and open Integrations, then configure ClickSyncr for this form. The setup dialog is headed Send this form to Loops and contains the account and mapping controls.
Connect the API key on the form, choose the destination, and save its integration settings. Forminator’s application being available does not complete every form’s setup. Return to the specific form and confirm that its email mapping and selected destination are saved.
In Loops, open Settings > API. Generate a key or copy an existing key, as described in the plugin’s setup instructions. Paste it into the form’s ClickSyncr for Loops configuration and select Connect. Choose the intended mailing list from the loaded destinations.
Confirm the Loops destination before mapping additional answers. If you change the account or select another mailing list, review the loaded fields again. Save the Forminator configuration after the connection and mappings are complete.
Map Email to the visitor’s email field. The standard Loops properties are firstName, lastName, source, userGroup, and userId. Custom contact properties are loaded from your Loops account. Their labels appear alongside the standard choices, with type information for the mapping.
Match each Loops field to the Forminator answer that contains the intended value. Check the source field’s label and type, especially when the form has similar names for several inputs. Use a test containing every mapped answer so missing values are visible during review.
Under Subscription and consent, select a Consent field if this Forminator form should send only opted-in contacts. When selected, a checked answer allows delivery and an unchecked answer sends nothing to Loops. Without a selected field, the saved status choice controls delivery.
Loops offers Subscribed – added to the list right away and Not synced – nothing is sent to Loops. This integration does not add a confirmation-email step. Choose the consent field when a visitor must opt in before their details are sent.
Submit the public form with a contact you control and fill every mapped answer. In Loops, inspect the selected mailing list and compare the stored values. Check ClickSyncr’s recorded sync status too. If consent is configured, repeat with it unchecked and confirm that the contact was not sent.
“No Loops mailing list selected” means the destination has not been set. Select the mailing list and save the form’s configuration. “Email is required” means there is no usable email value for the API request; inspect the mapping and the submitted answer.
The message “Nothing was sent. This form has no API key.” calls for checking the saved Loops connection on this form. Fix the reported issue before testing again. Do not assume a Forminator success message means the destination accepted the contact.
The Loops overview covers the destination, while the Forminator hub covers the builder. Review ClickSyncr Pro separately if you are comparing the available editions.
When a test entry reaches Loops with the right fields and consent, the Forminator Loops integration is ready for real visitors.
Yes. The plugin loads custom contact properties from your Loops account and offers them with its standard fields. Map each property to the corresponding form answer. The available custom names depend on your account, so create the property in Loops and refresh the choices before mapping it. Submit a test containing that value and inspect the stored contact afterward.
Connect your Loops API key in the form’s ClickSyncr settings, then choose the mailing list offered for that account. The destination belongs to that form’s configuration. Review the saved choice when you copy or rework a form, and check membership during testing. A successful account connection does not replace the need to choose the list that should receive the contact.
The sending path marks the contact as subscribed and adds it to the selected mailing list. The alternative Not synced setting sends nothing. A configured consent field takes precedence: a checked answer permits delivery, while an unchecked answer stops it. This setup does not send a double opt-in confirmation message, so test both consent outcomes before using the form for newsletter signups.
What you will see
The same panel appears inside every supported form builder, on each form you connect.
More guides
Set up the Forminator Benchmark Email integration with ClickSyncr for Benchmark Email.
View guideConnect Forminator to Beehiiv and every form submission becomes a subscriber in the publication you choose.
View guideConnect Forminator to Brevo and every form submission becomes a contact in the Brevo list you choose.
View guideConnect Forminator to Campaign Monitor and every form submission becomes a subscriber in the Campaign Monitor list you choose.
View guideSet up the Forminator Elastic Email integration with ClickSyncr for Elastic Email.
View guideConnect Forminator to EmailOctopus and every form submission becomes a subscriber in the EmailOctopus list you choose.
View guideThe Forminator GetResponse integration uses ClickSyncr for GetResponse to send each submission to a GetResponse list.
View guideConnect Forminator to Kit, the email platform formerly known as ConvertKit, and every form submission becomes a subscriber in the Kit form you choose.
View guideConnect Forminator to Klaviyo and every form submission becomes a profile in the list you choose.
View guideConnect Forminator to MailerLite and every form submission becomes a subscriber in the group you choose.
View guideConnect Forminator to Moosend and every form submission becomes a subscriber in the Moosend mailing list you choose.
View guideThe Forminator SendPulse integration uses ClickSyncr for SendPulse to send each submission to a SendPulse address book.
View guideSet up the Forminator Drip integration with ClickSyncr for Drip.
View guideYour next subscriber is one connection away
Install ClickSyncr, connect your platform, and publish your first tested sync in about two minutes.
Built by Renzo Johnson